
However, instead of making a bunch of tiles and then painting them, I opted to make a few printable textures that I could glue to the cardboard - thus enabling me to make a bunch of tiles quickly and easily (and if you're interested to see what I've done previously, simply click the 2.5D tag at the end of this post).
Anyway, since a recent delivery came in a nice big (double corrugated) box, I thought I would revisit the 2.5D dungeon, and turn this packaging into a few wooden walkways and/or balconies - thus giving the dungeon a multilevel feel (and allowing the players and monsters to take advantage of elevated positions).
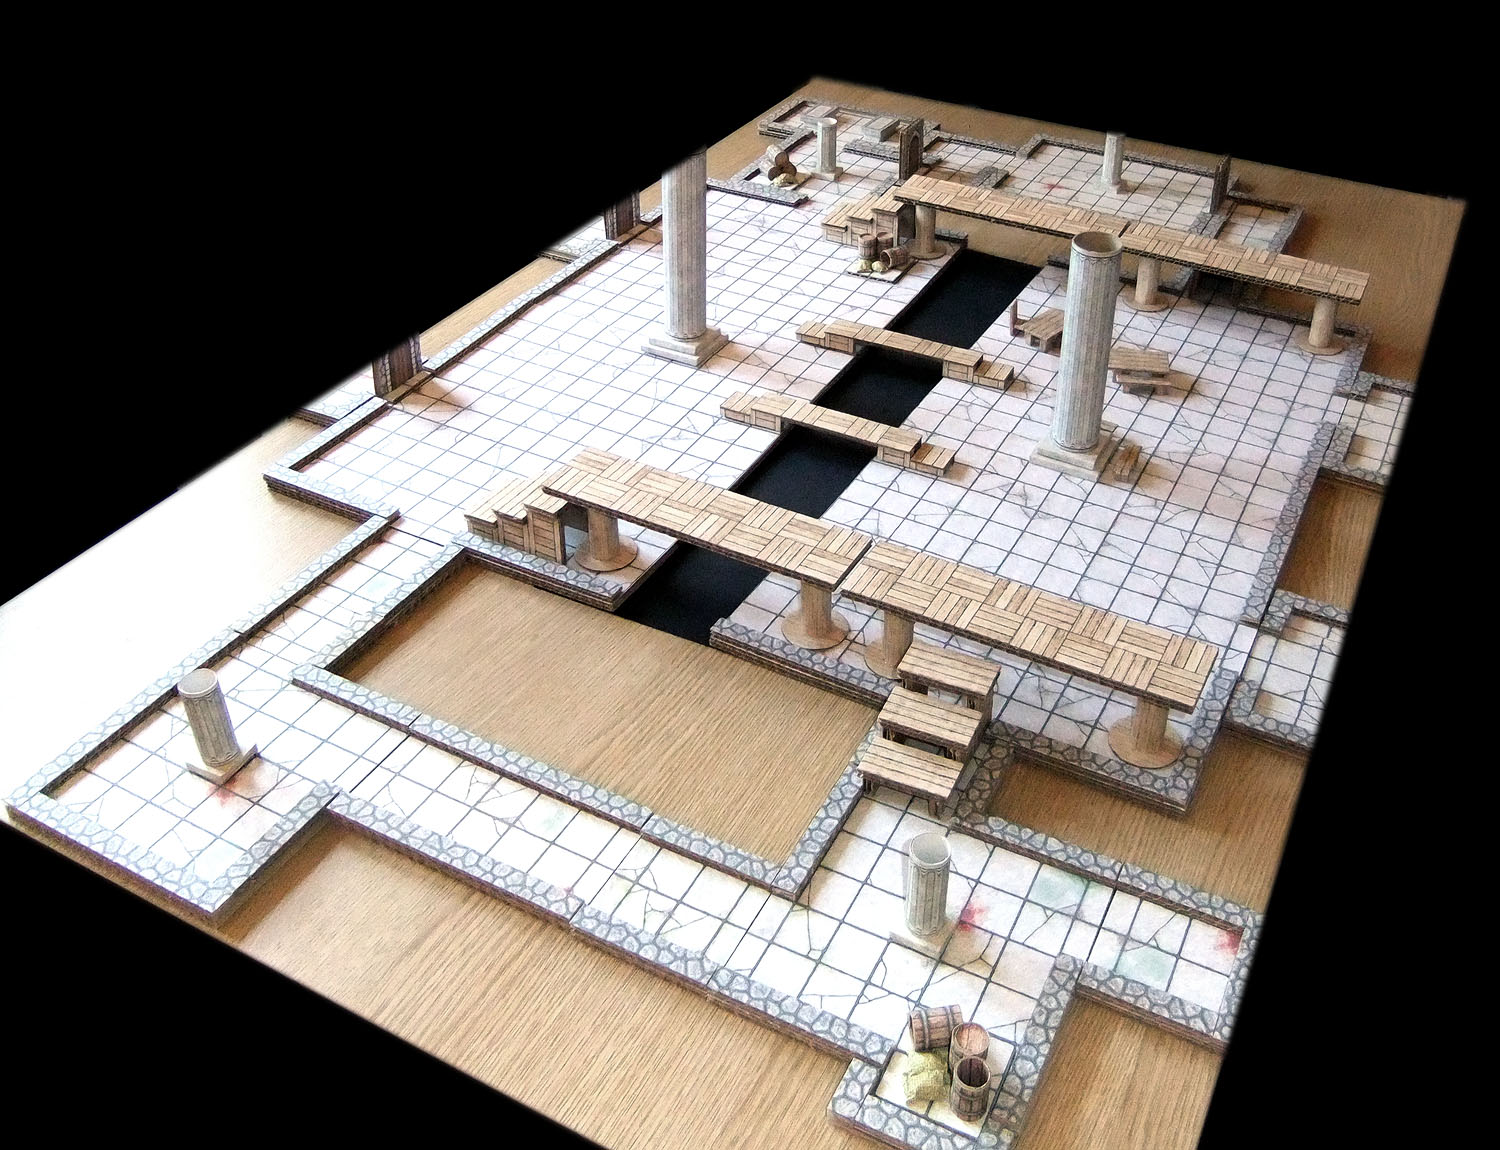
So, with that in mind, here's what I've come up with...
And if you're interested in making some of these bits and pieces yourself, here's how to do it...
First of all, you'll need to print off the pages of THIS PDF file.
However, before we go any further, it's worth noting that I've drawn the textures so that the distance between each individual 'horizontal plank' is one quarter of an inch - so you should be able to cut along the lines without the need to do much measuring :)
MAKING THE STEPS
For the stairs, you'll want to glue the top two textures on page one of the pdf to some thick cardboard, and then cut them out (with a box cutter) to the desired shape (which will depend on how large you want to make your steps).

For my own steps I've chosen to make them 2" wide and three steps high (with the distance between each step being half an inch). I have therefore cut the 'plank' texture into three 2" X 1" sections to represent the steps, and the side texture into the shapes pictured above.
Once that's done, it's a simple matter of gluing them together with a hot glue gun (note that I like to have the steps overhang the sides ever so slightly).

MAKING THE RAISED SECTIONS
For the walkways/balconies you'll need to glue the wooden floor texture (on page 2) to some thick cardboard, and cut it to the desired shape. Once that's done you'll need to make the support pillars in exactly the same way as the stone pillars SHOWN PREVIOUSLY - except that you'll use the plain wooden texture on page one. Furthermore, you might also like to make a simple base for each of the pillars (using the same plain texture glued to some thin cardboard) to make the whole thing a little more stable.

And once again, it's then just a matter of hot-gluing it all together.

And that's all there is to it! Obviously you could take a little more time than I have and wrap the wooden textures around the edges of the cardboard - but once you've laid several pieces down on the table, you hardly notice the exposed edges.

* * *
So that's what I've been up to this holiday weekend :) ...and if you have a go at making a few of these yourself (or any other 2.5D stuff) I'd love to hear how you get on.

Very nice. I'm a fan of those crafting videos as well, but this is much simpler.
ReplyDeleteWhere do you find these print outs, like the stone for the floors and walls?
I'm actually drawing all the images/textures from scratch (usually in photoshop).
DeleteDo you have any rooftop images/textures that you'd be willing to share? The ones that I have seen do not print too well (too dark, mostly).
ReplyDeleteSorry. I don't have anything like that yet.
DeleteThanks for sharing these!
ReplyDeleteNo problem :)
Delete